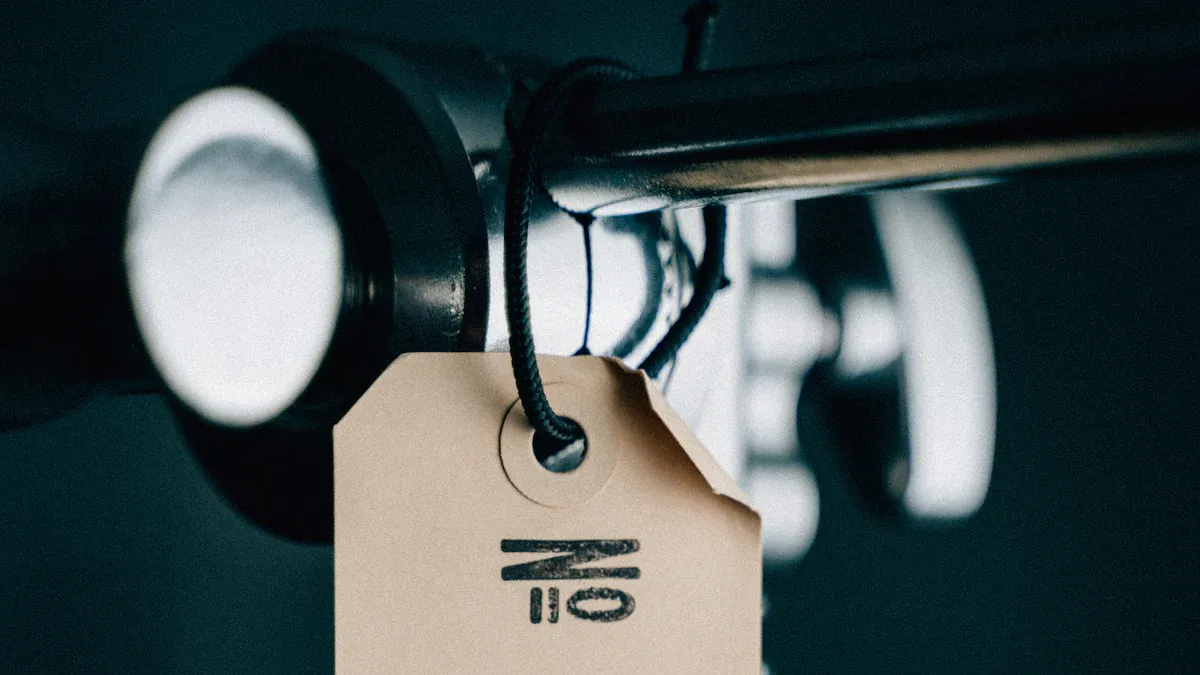
You start the installation process for electronic price tags by preparing your workspace and collecting the required tools. Many retailers now use digital price tags because they support sustainability, cut labor costs, and improve pricing accuracy. When you handle tags such as Electronic Shelf Labels, ESL Price Tag, or e-ink digital price tag, you automate price changes and boost operational efficiency. The procedure involves initializing tags, connecting them to an ESL Gateway AP, and verifying data sync. With this step-by-step guide, you ensure your Esl Retail store benefits from reliable digital shelf price tags.
Installation Process Preparation
Tools and Accessories for Electronic Shelf Labels
Essential Tools Checklist
Before you begin, gather all necessary tools to streamline your workflow and prevent delays. Most manufacturers recommend the following items for a smooth process:
- Gloves for safe handling of labels and accessories.
- Cutter knife for opening boxes and trimming packaging.
- Box tape to reseal cartons after inspection.
- SOLUM remover tool for detaching labels if repositioning is needed.
- Marker pen for labeling boxes or marking shelf positions.
Tip: Prepare your workspace in a spacious area with a table and at least one assistant. This setup helps you organize components and reduces the risk of misplacing small parts.
Mounting Accessories Overview
You will encounter several mounting options when working with electronic shelf labels. Many labels feature a built-in magnet, which allows you to attach them securely to iron shelves without extra tools. This magnetic design ensures stability, even in high-traffic areas, and makes repositioning straightforward. For shelves that do not support magnets, use clips, clamps, or adhesive mounts as specified by the manufacturer. Always check the compatibility of accessories with your shelf type before proceeding.
Preparing the Installation Area
Cleaning and Organizing Shelves
Start by inspecting and organizing your labels and accessories by aisle or section. This approach streamlines the process and minimizes confusion. Remove all old paper tags and adhesive residues from the shelves. Use a lint-free cloth to clean shelf edges thoroughly. Clean surfaces ensure proper adhesion and prevent future issues with label stability.
Note: Proper cleaning not only improves adhesion but also enhances the professional appearance of your displays.
Ensuring Power and Network Connectivity
Check that your installation area has reliable power and network connectivity. Confirm that all required outlets and network ports are accessible and functional. If your electronic shelf labels rely on wireless communication, verify that the signal strength is adequate throughout the installation area. Address any connectivity issues before you begin mounting labels to avoid delays during system initialization.
Reminder: Following manufacturer instructions for mounting accessories and procedures ensures a successful installation and reduces troubleshooting later.
Unboxing and Inspecting Electronic Shelf Labels

Unpacking and Organizing Components
Safe Handling of Electronic Price Tags
When you open the boxes containing your tags, handle each tag with care. The display panel is fragile and can break if you drop or bump it. Always use gloves to avoid leaving fingerprints or causing accidental damage. Place each tag on a flat, stable surface. Never store or stack tags on a sloped area, as they can slide off and break. Keep tags away from moisture and liquids, which can damage the internal circuits. Avoid twisting or bending the tags, since this can crack the casing or harm the electronic components inside.
Tip: Store tags within the recommended temperature range and away from heat-producing appliances or pressurized containers. This practice helps prevent damage and ensures your tags remain in top condition.
Sorting and Staging Labels
After you unpack the tags, sort them by size, type, or aisle location. Grouping tags before installation speeds up the process and reduces confusion. Use trays or bins to stage the tags near their intended shelves. Label each group clearly so you can quickly identify which tags go where. This organization step helps you avoid mixing up tags and ensures a smooth workflow.
Checking for Damage or Missing Parts
Visual Inspection Procedures
Before you install any tags, inspect each one for visible damage or missing parts. Look for cracks on the display, loose components, or signs of moisture exposure. Check that each tag has all required accessories, such as mounting clips or batteries. Use the following checklist to guide your inspection:
- Examine the display panel for cracks or scratches.
- Confirm that the casing is intact and not bent or twisted.
- Ensure there are no missing buttons, covers, or mounting parts.
- Check for any signs of liquid damage or corrosion.
- Keep tags away from strong magnetic fields, which can cause malfunctions.
If you find any issues, set those tags aside for further review.
Reporting and Replacing Faulty Items
When you discover a damaged or incomplete tag, document the issue immediately. Take a photo if possible and note the serial number. Report the problem to your supplier or technical support team. Most manufacturers have a process for replacing faulty tags or missing parts. Do not attempt to repair damaged tags yourself, as this can void the warranty. Always use only approved replacement parts to maintain the reliability of your electronic shelf labels system.
Note: Careful inspection and prompt reporting help you avoid installation delays and ensure that only fully functional tags reach your shelves.
Initializing Electronic Shelf Labels
Powering On and Battery Installation
Inserting or Charging Batteries
You need to start the digital price tag system by installing or charging the batteries for each tag. Most digital price tags use long-life batteries, which means you will not need to replace them often. Always check the manufacturer’s instructions before inserting batteries. Place each battery in the correct orientation to avoid damaging the electronic components. Some digital price tags arrive with batteries pre-installed, while others require you to insert them before use. If your tags use rechargeable batteries, connect them to the charger and wait until the indicator shows a full charge.
Tip: Handle batteries with care. Avoid touching the contacts with your fingers to prevent corrosion or poor connections.
Here is a quick reference for average battery life across popular electronic shelf labels:
| Manufacturer/Product Line | Battery Life Range | Conditions/Notes |
|---|---|---|
| Neuroshop ESLs | 3 to 10 years | 2 refreshes/day; varies by temperature |
| 1.54″ Lite series electronic shelf label | 5 to 10 years | 2-4 updates/day |
| ESLMFG 2.4G 4.2 inch Digital Price Tag | 3 to 5 years | Up to 5 years under normal usage |
| MR Retail ESLs | 3 to 5 years | Low power consumption, energy saving |
Verifying Power Status
After installing or charging the batteries, check the power status of each tag. Most digital price tags display a power icon or LED indicator. If the tag does not power on, recheck the battery orientation or try a new battery. Confirm that every tag in your digital price tag system is active before moving to the next step. This step ensures a smooth setup and prevents issues during label initialization.
System Pairing and Configuration
Connecting to Central Server or Controller
You must connect your tags to the central server or controller to enable real-time price updates. Most digital price tag systems use wireless communication, such as radio frequency (RF), infrared (IR), or Bluetooth. RF is the most common method because it offers reliable range and low power use. The system includes label management software, a communication station, and the terminal display tags. The software sends product and price data to the tags through the communication station. This setup allows you to manage thousands of digital price tags across your store.
Manual Initialization Methods
Some digital price tag systems require manual label initialization. You may need to scan a QR code or use a handheld device to pair each tag with the system. Follow the manufacturer’s instructions for manual pairing. This process links each tag to the correct location in your store and ensures accurate price display. Always verify that each tag receives the correct data from the central server before proceeding.
Assigning Product and Price Information
Linking Labels to SKU Codes
You need to assign each tag to a specific product by linking it to the correct SKU code. Start by analyzing your current pricing and product data. Integrate the digital price tag system with your existing ERP or POS software. This integration allows you to automate price and promotion management, reducing manual work and errors. Assign each tag to its product location and SKU in the management software.
Data Synchronization with Management Software
Once you link the tags to SKU codes, synchronize the data between your management software and the digital price tags. The system will push updated price and product information to each tag. Check that every tag displays the correct price and product details. This step ensures your electronic shelf labels always show accurate information. Ongoing support and optimization help you adapt the system as your store changes.
Note: Regularly review your digital price tag system to maintain accuracy and improve customer engagement.
Label Installation on Shelves and Fixtures
Selecting the Right Mounting Method
Choosing the correct mounting method for your digital price tags ensures a secure fit and smooth operation. You need to match the mounting solution to your shelf type and store environment. Most retailers use shelf-edge mounting, which integrates digital price tags directly with product SKUs and backend systems. This method mirrors traditional price tag placement but adds digital flexibility and accuracy.
Rail and Track Systems
Rail and track systems offer a reliable and widely used solution for mounting digital price tags. You attach rails to the front edge of shelves, then slide the tags into place. This approach works well for long runs of shelving and supports rapid label installation. Many brands design their rails to fit multiple tag sizes, making them adaptable for different product categories. You benefit from a clean, uniform look and easy repositioning when you update your displays.
Clip-On, Hook, Adhesive, and Magnetic Mounts
You may encounter shelves that do not support rails. In these cases, clip-on, hook, adhesive, and magnetic mounts provide flexible alternatives. Clip-on and hook mounts attach directly to wire or thin-edged shelves. Adhesive mounts stick to smooth surfaces, such as glass or plastic, and work best in low-traffic areas. Magnetic mounts excel on metal shelves, allowing you to reposition tags quickly. Some manufacturers offer rotatable and adjustable fixtures, letting you set the viewing angle for optimal visibility. These mounting options simplify installation and reduce the need for custom parts.
Tip: Always check the compatibility of your mounting accessories with both your digital price tags and your shelving system before starting installation.
When selecting a mounting method, consider several factors:
- The type of shelving and fixture materials in your store.
- Store traffic and environmental conditions that affect durability.
- The need for easy installation with minimal tools.
- Compatibility with various ESL brands and systems.
- The availability of installation instructions and support.
- Customization options for unique fixtures or layouts.
Step-by-Step Label Installation Process
Positioning and Attaching Labels
Begin by staging your digital price tags near their intended shelves. You should align each tag with the correct product location, using your planogram or store layout as a guide. For rail systems, slide the tags into the rail and ensure they click into place. For clip-on or hook mounts, snap the tags onto the shelf edge or wire. If you use adhesive or magnetic mounts, press the tags firmly against the surface for a secure hold.
Follow this checklist for efficient label installation:
- Confirm the tag matches the product and price location.
- Align the tag with the shelf edge or mounting point.
- Attach the tag using the selected mounting method.
- Double-check that the tag faces forward and is easy to read.
Note: Proper positioning ensures customers can see price information clearly and reduces the risk of tags falling or shifting.
Securing Stability and Alignment
After attaching your digital price tags, check each one for stability. Gently tug on the tag to confirm it stays in place. Adjust the angle if your mounting system allows, making sure the display is visible from the aisle. For long shelf runs, use a level or straightedge to keep tags aligned. Consistent alignment improves the professional appearance of your displays and helps customers find price information quickly.
If you notice any loose or unstable tags, try a different mounting accessory or reposition the tag. Some shelves may require custom solutions or additional supports to maintain stability.
Adapting to Different Shelf Types
You will encounter a variety of shelf materials and designs in your store. Each type requires a specific approach to label installation.
Wire, Glass, and Wooden Shelves
- Wire Shelves: Use clip-on or hook mounts that grip the wire securely. These mounts prevent tags from sliding or rotating. For added stability, select mounts designed for the wire gauge of your shelves.
- Glass Shelves: Choose adhesive mounts with transparent backing to maintain a clean look. Avoid heavy tags that could stress the glass. Magnetic mounts do not work on glass.
- Wooden Shelves: Use adhesive or screw-in mounts, depending on the finish and thickness. Adhesive mounts work best on smooth, sealed wood. For rough or unfinished wood, consider mechanical fasteners.
You must evaluate the durability and safety of your mounting method. Select materials that are stable, non-toxic, and suitable for your store’s environment. Consider space constraints and the visual appeal of your digital price tags.
Handling Special Fixtures
Some fixtures, such as refrigerated cases, endcaps, or custom displays, present unique challenges. You may need to use specialized mounts or request custom solutions from your supplier. Providers often supply a range of ESL fixings, but you might need to adapt installation methods for unusual locations. Always prioritize ease of installation and minimal disruption to store operations.
Callout: Managing the complexity of label installation on special fixtures helps minimize downtime and ensures your digital price tags function reliably across your entire store.
You should also plan for ongoing maintenance. If your tags use batteries, check that you can access them easily for replacement. Monitor device health and schedule regular inspections to keep your digital price tags performing at their best.
Troubleshooting Installation Issues
When you install a digital price tag system, you may encounter a few common challenges. Addressing these issues quickly helps you maintain accurate pricing and smooth store operations. This section guides you through the most frequent problems and their solutions.
Connectivity and Communication Problems
Signal Interference Solutions
Wireless communication forms the backbone of most digital price tags. Signal interference can disrupt updates or cause tags to lose connection. You should check for sources of interference, such as nearby Wi-Fi routers, metal shelving, or electronic devices. Move these items away from your digital price tag system if possible. Adjust the placement of your access points to improve coverage. Many retailers use plug-and-play technology to reduce setup complexity and minimize downtime. If you still experience issues, try switching to a less crowded wireless channel.
Tip: Keep your access points elevated and clear of obstructions to maximize signal strength.
Network Configuration Checks
A stable network ensures your digital price tags receive timely updates. You need to verify that your network settings match the requirements of your digital price tag system. Check that all devices have the correct IP addresses and that firewalls do not block communication. Test the connection between your central server and the tags. If you use APIs or middleware to connect with your POS or ERP, confirm that integration settings are correct. Many vendors provide robust APIs to support major retail platforms, making integration smoother.
Display and Data Errors
Resolving Data Sync Issues
Sometimes, digital price tags display outdated or incorrect information. This usually results from data synchronization problems. You should first check the management software for pending updates. Push a manual sync to force the system to update all tags. If the issue persists, restart the affected tags and verify their connection to the server. Regular data checks help you catch errors before they reach customers.
Software Troubleshooting Steps
Software glitches can cause display errors or prevent price updates. Restart the management software and check for available updates. Review system logs for error messages. If you find recurring issues, contact your technical support team for guidance. Many digital price tag systems now offer remote diagnostics, which allow you to resolve problems without on-site visits. This feature reduces operational disruption and keeps your store running smoothly.
Physical Label Installation Challenges
Fixing Loose or Unstable Labels
Loose or unstable tags can fall off shelves or become misaligned. You should inspect each mounting accessory for proper fit. For rail systems, ensure tags click securely into place. For clip-on or adhesive mounts, press firmly and check for movement. If a tag remains loose, try a different mounting method or accessory. Consistent alignment improves the professional look of your displays.
Accessory Compatibility Solutions
Not all mounting accessories work with every shelf type. Before installation, confirm that your chosen accessories match both your digital price tags and your shelving material. If you encounter compatibility issues, consult your supplier for alternative solutions. Many vendors offer a range of fixtures to fit wire, glass, or wooden shelves. Planning ahead helps you avoid delays and ensures a seamless installation.
Note: System maintenance remains a top concern for many retailers. Advances in battery technology, such as 4th-generation BLE batteries, now provide up to 10 years of reliable service. Regular inspections and remote support further reduce maintenance challenges.
Final Checks and Optimizing Electronic Shelf Labels
Testing Label Functionality
Verifying Display Clarity and Price Updates
You need to confirm that each electronic shelf label displays information clearly. Walk along each aisle and check the screens for sharp text and accurate product details. If you see any faded or unreadable displays, replace those tags before opening your store to customers. Test the update process by sending a new price to a few digital price tags. Watch for instant changes on the screens. This step ensures that your system pushes updates correctly and that customers always see the right price.
Tip: Use a checklist to track which sections you have tested. This approach helps you avoid missing any shelves or fixtures.
Confirming System Integration
You should verify that your electronic shelf labels communicate with your store’s management software. Open your label management dashboard and select a random sample of tags. Change the price or product name in the software. Check the corresponding tag to see if it updates in real time. If you notice delays or errors, review your network settings and server connections. Proper integration guarantees that your digital price tags always reflect current promotions and inventory changes.
Maintenance and Best Practices
Cleaning and Care Guidelines
You must keep your electronic shelf labels clean to maintain their performance and appearance. Use a soft, lint-free cloth to wipe the screens. Avoid harsh chemicals or abrasive materials, as these can damage the display. For stubborn spots, use a slightly damp cloth with mild soap. Dry the tags immediately after cleaning. Clean tags not only look professional but also ensure that customers can read the price and product information without difficulty.
Regular cleaning prevents dust buildup and extends the lifespan of your digital price tags.
Scheduling Regular Inspections
Set a schedule for routine inspections of your electronic shelf labels. Inspect each tag for secure mounting, clear display, and correct price information. Create a simple table to log your inspection results:
| Inspection Date | Section | Issues Found | Action Taken |
|---|---|---|---|
| 2024-06-01 | Dairy | 2 loose tags | Reattached |
| 2024-06-01 | Snacks | None | N/A |
You should review this log monthly. Address any recurring problems quickly. Regular inspections help you catch issues before they affect your store’s operations. Consistent maintenance keeps your digital price tags reliable and your pricing accurate.
Ensuring a Smooth Installation Process
Staff Training and Support Resources
Using Instructional Videos and Manuals
You set your team up for success by providing clear training resources. Instructional videos offer step-by-step demonstrations that help staff visualize each part of the installation process. Manuals supply detailed instructions and troubleshooting tips. When you combine both, you create a comprehensive learning environment. Encourage your staff to review these materials before starting installation. This approach reduces errors and builds confidence.
Tip: Schedule a short group session to watch key video segments together. Discuss common challenges and clarify any questions before hands-on work begins.
Accessing Technical Support
Even with thorough training, you may encounter unexpected issues. Reliable technical support ensures you resolve problems quickly. Most electronic shelf label providers offer dedicated hotlines, online chat, or email support. Keep contact information handy during installation. When you reach out, provide clear details about the issue and any troubleshooting steps you have tried. Fast access to expert help minimizes downtime and keeps your project on track.
Tips for Large-Scale Label Installation
Planning and Coordination
Large-scale installations require careful planning. Start with a thorough assessment of your store. Analyze traffic flow, review sales data, and gather feedback from your team. Study your competitors to understand best practices. Use this information to design an installation plan that fits your store’s needs.
- Assess your store layout and customer movement patterns.
- Review sales data to prioritize high-impact areas.
- Gather feedback from staff and observe customer behavior.
- Conduct a competitive audit to benchmark your approach.
- Plan a phased rollout, starting with a pilot area.
- Collect data during the pilot and refine your process.
- Expand installation store-wide once you confirm success.
You can create distinct display zones to guide shoppers and maintain a consistent look across departments. Align your display strategy with your brand and customer preferences. Incorporate sustainable practices and technology to enhance both customer experience and operational efficiency.
Efficient Deployment Strategies
Efficient deployment depends on skilled teams and strong project management. Many retailers rely on experienced nationwide teams with years of retail installation expertise. These teams ensure accurate placement and seamless integration of electronic shelf labels.
| Strategy Aspect | Description |
|---|---|
| Experienced Nationwide Teams | Trained employees with extensive retail experience ensure precise ESL placement and smooth integration. |
| End-to-End Project Management | Oversee the entire process, from planning and scope definition to timely, on-budget completion. |
| Ongoing Support | Provide continuous maintenance and resets to keep operations running smoothly after installation. |
| Integration with Retail Services | Combine ESL installation with merchandising and fixture setup to boost efficiency and minimize disruption. |
| Flexible Deployment Capability | Agile teams and nationwide coverage help you meet tight deadlines and overcome labor shortages. |
| Proven Track Record | A large, skilled workforce supports efficient rollouts across multiple locations. |
Note: When you coordinate installation with other retail services, you reduce disruptions and maximize efficiency. Regular communication between teams helps you stay on schedule and address challenges as they arise.
You achieve the best results by following a step-by-step guide for your electronic shelf label installation process. Careful preparation, accurate label placement, and attention to detail at each stage ensure pricing accuracy and operational efficiency. Industry research shows that a well-executed installation process reduces labor costs, improves pricing consistency, and enhances customer trust. If you face challenges, consult product manuals, training resources, or technical support. Investing in quality fixings and ongoing maintenance keeps your installation process reliable and your store running smoothly.
FAQ
How long does it take to install electronic price tags in a typical store?
You can usually complete installation in one to three days, depending on store size and staff experience. Preparation and planning help you finish faster. Large stores may require phased rollouts.
Can you reuse electronic shelf labels if you rearrange your store?
Yes, you can reuse most electronic shelf labels. Detach them carefully using the recommended tool. Reassign each label to the new product location in your management software.
What should you do if a tag does not display the correct price?
First, check the tag’s connection to the server. Push a manual data sync from your management software. If the issue persists, restart the tag or contact technical support for further assistance.
Do electronic price tags work during a power outage?
Most electronic price tags use batteries and retain displayed information during power outages. You will not lose pricing data. Updates resume automatically when power and network connectivity return.
How often should you inspect and maintain electronic shelf labels?
You should inspect your labels monthly. Check for secure mounting, clear displays, and accurate prices. Clean the screens regularly to maintain readability and professional appearance.
Are electronic price tags compatible with all types of shelves?
You can mount electronic price tags on most shelf types using the right accessories. Choose from rails, clips, adhesives, or magnets. Always verify compatibility with your shelving system before installation.
What training do staff need for electronic price tag installation?
Staff should review instructional videos and manuals before installation. Hands-on practice helps build confidence. You can schedule a group session to address questions and demonstrate key steps.
Can you update prices remotely with electronic shelf labels?
Yes, you can update prices remotely through your management software. The system pushes changes to all connected tags in real time, ensuring pricing accuracy across your store.